Object manipulation with the Baxter robot
Object manipulation with the Baxter robot
This website presents various demonstrations of pick and place tasks with the Baxter research robot. It contains object recognition and manipulation with different focus areas such as various shapes, sizes, and colours. It also includes trajectory and motion planning and the use of different grippers with the physical robot and in the simulation with gazebo, too. The demonstrations, based upon a project from Abhishek Patil from the Northwestern University. (Project from Abhishek Patil)
Contents
The packages include the following files:
- baxter_pnp.py
It includes the commands for the pick and place task and subscribes to the topic “detected objects” which contains the coordinates of the objects. The MoveGroupCommander and the PlanningSceneInterface are used for the movements. - baxter_img.cpp
The file is for the object detection with the Baxter hand camera. The tool OpenCV is used and the results are published to the topic “detected_objects”. - baxter_pick_and_place.launch
The launch file runs all the required nodes for the specific project. - Folder with models for simulation
The projects for the simulation contain some models for the objects and the table which are from the Rethink Robotics example.
Prerequisites
Workstation Setup
To set the workstation, the tutorial from Rethink Robotics has been consulted, in this site you can find the installation of Ubuntu, the ROS specific version for that Ubuntu version, the Baxter SDK and the instructions for establishing the first comunication with the robot, which requires an Ethernet connection.
Example: Network Connection->Add->Ethernet
Connection name: Baxter
IPv4 Settings: Method: Manual
Address: 169.254.0.10, Netmask: 255.255.0.0, Gateway: 0.0.0.0
MoveIt
MoveIt! is used for the motion planning, manipulation and collision checking.
Moreover the package moveit_python by Michael Ferguson needs to be installed.
Robot arm calibration
It is recommended to calibrate Baxter’s arms for getting more precise results. On the website there are two different calibration routines which are very well described.
Table position and zero point in MoveIt
It is very annoying to find every time you change the position of the robot or the used table to get the right sizes and coordinates manually for the simulation in MoveIt!. There are two programs which make this task easier. The first one is used to get the distance from the ground to the zero point from the reference frame “base” from MoveIt!. This value is always the same if the robot position doesn’t change. The table height must be smaller than 0.9 m and known to get this distance. Package to get to zero point
Then you can continue with the second program which finds the size and the position of the table. At first add the measured distance from the task before. Package to get the table size and position
The color of the objects
The object recognition can only work if the colors of the objects are known. The colors are defined in the baxter_img.cpp file as low and high hsv values. The example colored_papers.pdf includes three different colors with the related hsv values. They can be printed and used for a first test to recognize them. Download the colored papers! But this aren’t the exact values because it depends on the printer settings, the ink, the paper, etc. The best way to get the color values from an object which should be detected is to take pictures with the Baxter camera from it on the workspace in different positions. This can be in the shadow from something or at a highly illuminated area. Moreover, it is recommended to have every time all the used colors on every picture to see that only the color with the specific hsv values is detected.
$ rosrun image_view image_view image:=/cameras/right_hand_camera/image
This command opens a window with a stream of images from Baxter’s right hand camera and allows to save images by right-clicking on the display window. Then the images can be analysed with the hsvThresholder.py file. Open a new terminal and execute the python file from the location where it is saved.
$ python hsvThresholder.py frame0000.jpg
Camera calibration and other parameters
The camera calibration is always necessary because every camera is different. The parameters can be determined with the Camera Calibration Toolbox for Matlab. The website explains the calibration and optimization from a camera with a printed checkerboard. The first calibration example, can be done with an example based on a total of 20 images to learn the process. Another option without the software Matlab is the tutorial Camera Calibration and 3D Reconstruction from OpenCV. The parameters must be changed in the baxter_img.cpp file which is in the package from the projects.
The distance from the camera to the object must be changed in function “Get3DPos” which is in the same file. (475 mm) Moreover must be the offsets “0.07+0.57” and “0.032” checked. They are necessary to get the coordinates in the Baxter coordinate system.
pose.position.x = rel_pos[i].x / 1000+0.07+0.57;
pose.position.y = rel_pos[i].y / 1000-0.032;
One object can be placed on the table and the position can be determined by the gripper position.
rostopic echo /robot/limb/left/endpoint_state/pose -n 1
rostopic echo detected_objects -n 1
Then must be the detected position of this object compared with the real one. The differences are the offsets. The factors 0.015 and 0.058 correct the small deviations from the functions (int) rect.center.x- WIDTH / 2 and -((int) rect.center.y- HEIGHT / 2) which are used in the code.
float tempx = _Ma(0, 0, INVTRANS) * src->x + 0.015;
float tempy = _Ma(1, 1, INVTRANS) * src->y + 0.058;
The following example shows the equations for the camera resolution 1280x800.
2*(1280/2-c_x)/f_x and 2*(800/2-c_y)/f_y
Further changes for the size of the objects are explained in the comments of the code.
Change grippers
At first the arguments in the demo_baxter.launch must be changed to true.
 <arg name="load_robot_description" default="true"/>
 <arg name="right_electric_gripper" default="true"/>
 <arg name="left_electric_gripper" default="true"/>
Then can the grippers be changed in the files left_end_effector.urdf.xacro and right_end_effector.urdf.xacro. The possible settings for this files are explained at this website.
Tasks Overview
The tasks use two different path planning functions which have advantages and disadvantages. The movements with the common function are in the most cases faster and smoother but sometimes it computes very strength pathes. The cartesian path planning allways plans straight ways to the added waypoints. This can be very important for tasks, like the pick and place tasks with the basket, where the orientation should be the same. The disadvantages are that the function can’t allways find a path to the goal and that it doesn’t wait to continue with the code until it finished. (See Troubleshooting section) Moreover the tasks present various variations to solve a task with different performances.
Measure MoveIt zero point
This package is used to get the distance from the ground to the zero point from the reference frame “base” from MoveIt. This value is needed for the collision checking and is allways the same if the robot position doesn’t change. The table height must be smaller then 0.9 m and added to the variable table_size_z. The right arm move from the start position down and measure with the infrared sensor the distance to the table and calculate the zero point with the current position, the distance to the table and the table height. The result will be printed on the screen and is required for all tasks.
The project must be added in the src folder from the workspace and can be launched after it is build from a sourced terminal. Open a new terminal:
$ source /opt/ros/indigo/setup.bash
$ source ros_ws/devel/setup.bash
$ cd ros_ws/
$ ./baxter.sh
$ catkin_make
$ roslaunch baxter_measure_zero_point baxter_pick_and_place.launch
Build a tower with one arm
In this project the Baxter build the tower only with the right arm. The right hand camera detect every time at the start position the objects on the table and they will be sorted by size. Then it allways pick the biggest one and build a tower. It approach the object and orientate the gripper to the right angle and if it failed to pick the object it try it again. This continue until the table is clear. The program require the values for the variable offset_zero_point, the table size and position.
Build a tower with one arm and detect the objects only one time
This change improves the performance of the Baxter because it detects the objects only at the start and at the end to look if the table is clear.
The project must be added in the src folder from the workspace and can be launched after it is build from a sourced terminal. Open a new terminal:
$ source /opt/ros/indigo/setup.bash
$ source ros_ws/devel/setup.bash
$ cd ros_ws/
$ ./baxter.sh
$ catkin_make
$ roslaunch baxter_pnp_one_arm baxter_pick_and_place.launch
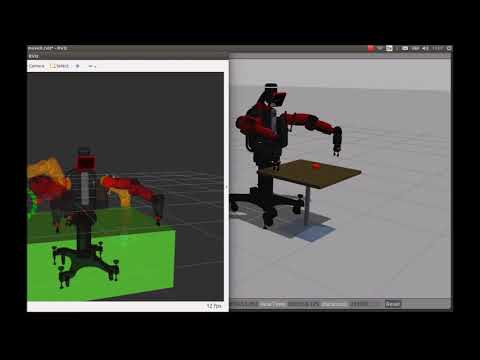
Build a tower with one arm in Gazebo
This is the same task in the simulation with Gazebo but the camera isn’t used and the position of the objects are fixed.
The project must be added in the src folder from the workspace for the simulation and can be launched after it is build from a sourced terminal. Open a new terminal:
$ source /opt/ros/indigo/setup.bash
$ source ros_gazebo_master/devel/setup.bash
$ cd ros_gazebo_master
$ ./baxter.sh sim
$ catkin_make
$ roslaunch baxter_gazebo baxter_world.launch
Open a second new terminal:
$ source /opt/ros/indigo/setup.bash
$ source ros_gazebo_master/devel/setup.bash
$ cd ros_gazebo_master
$ ./baxter.sh sim
Wait until the message “Simulator is loaded and started successfully” in the first terminal appears.
$ rosrun baxter_tools enable_robot.py -e
$ roslaunch baxter_pnp_one_arm_cartesian_sim baxter_pick_and_place.launch
Build a tower with both arms alternately
In this project the Baxter build the tower with both arms alternately. Both of the hand cameras detect every time at the start position the objects on the table and they will be sorted by size. The arms pick only the objects on their side and allways start with the biggest one and build a tower together. The grippers approach the objects and orientate to the right angle and if they fail to pick an object they try it again. This continue until the table is clear. The program require the values for the variable offset_zero_point, the table size and position.
The project must be added in the src folder from the workspace and can be launched after it is build from a sourced terminal. Open a new terminal:
$ source /opt/ros/indigo/setup.bash
$ source ros_ws/devel/setup.bash
$ cd ros_ws/
$ ./baxter.sh
$ catkin_make
$ roslaunch baxter_pnp_both_arms_alternately baxter_pick_and_place.launch
Pick and Place with a basket
The task from Baxter is to grip a pink basket with the left gripper and throw the cubes with the right gripper in it. It starts to find the position of the basket. At first the right hand camera detect the it from the start position and move to it. Then it looks a second time because if the basket is not directly under the camera it will also detect the sides from the basket and this cause deviations.

In the next step moves the right arm to the side of the table and the left arm approach the detected position with a specific orientation. It moves a little bit further than the pick goal to have it very close in the gripper. Then the left gripper grip it and moves to the start position for the left arm which has specific joint coordinates because they allows a high probability that a valid cartesian path can be found. The right hand camera detect every time at the start position the objects on the table. The right gripper approach the object and orientate to the right angle and pick the object. If it failed to pick an object it try it again. Then the right gripper moves up and the left gripper moves with the basket under it. The cube will be thrown in the basket and this continue until the table is clear. The program require the values for the variable offset_zero_point, the table size and position.
The project must be added in the src folder from the workspace and can be launched after it is build from a sourced terminal. Open a new terminal:
$ source /opt/ros/indigo/setup.bash
$ source ros_ws/devel/setup.bash
$ cd ros_ws/
$ ./baxter.sh
$ catkin_make
$ roslaunch baxter_pnp_basket_cartesian baxter_pick_and_place.launch
Troubleshooting
The projects include some features to solve problems when the robot failed. The following video will explain them.
The simulation in Gazebo has sometimes the problems that the object slip out of the gripper or it doesn’t stop to move.
Errors “Invalid Trajectory: start point deviates from current robot state more than …“
$ rosparam set /move_group/trajectory_execution/allowed_start_tolerance 0.0
Copyright (C) 2017 Maik Heufekes, 05/07/2017.
This program is free software: you can redistribute it and/or modify it under the terms of the GNU Lesser General Public License as published by the Free Software Foundation, either version 3 of the License.
This program is distributed in the hope that it will be useful, but WITHOUT ANY WARRANTY; without even the implied warranty of MERCHANTABILITY or FITNESS FOR A PARTICULAR PURPOSE. See the GNU Lesser General Public License for more details.
You should have received a copy of the GNU Lesser General Public License along with this program. If not, see http://www.gnu.org/licenses/.